How to Set Up an Xprinter XP-C300H
A step-by-step guide to connecting an Xprinter XP-C300H to MeeD POS on iPad via a LAN cable. Setup takes about 10–15 minutes.
What You'll Need
- An Xprinter XP-C300H
- A LAN (RJ-45) cable long enough to reach the router
- The power adapter and cable
- The WiFi router your iPad is connected to
- 80 × 80mm thermal paper
- An iPad with the MeeD POS app installed
How to Set It Up
Step 1 — Prepare the Hardware and Cabling
Connect the Power Cable
Plug the power cable into the adapter, then plug it into an outlet — no need to turn it on yet.
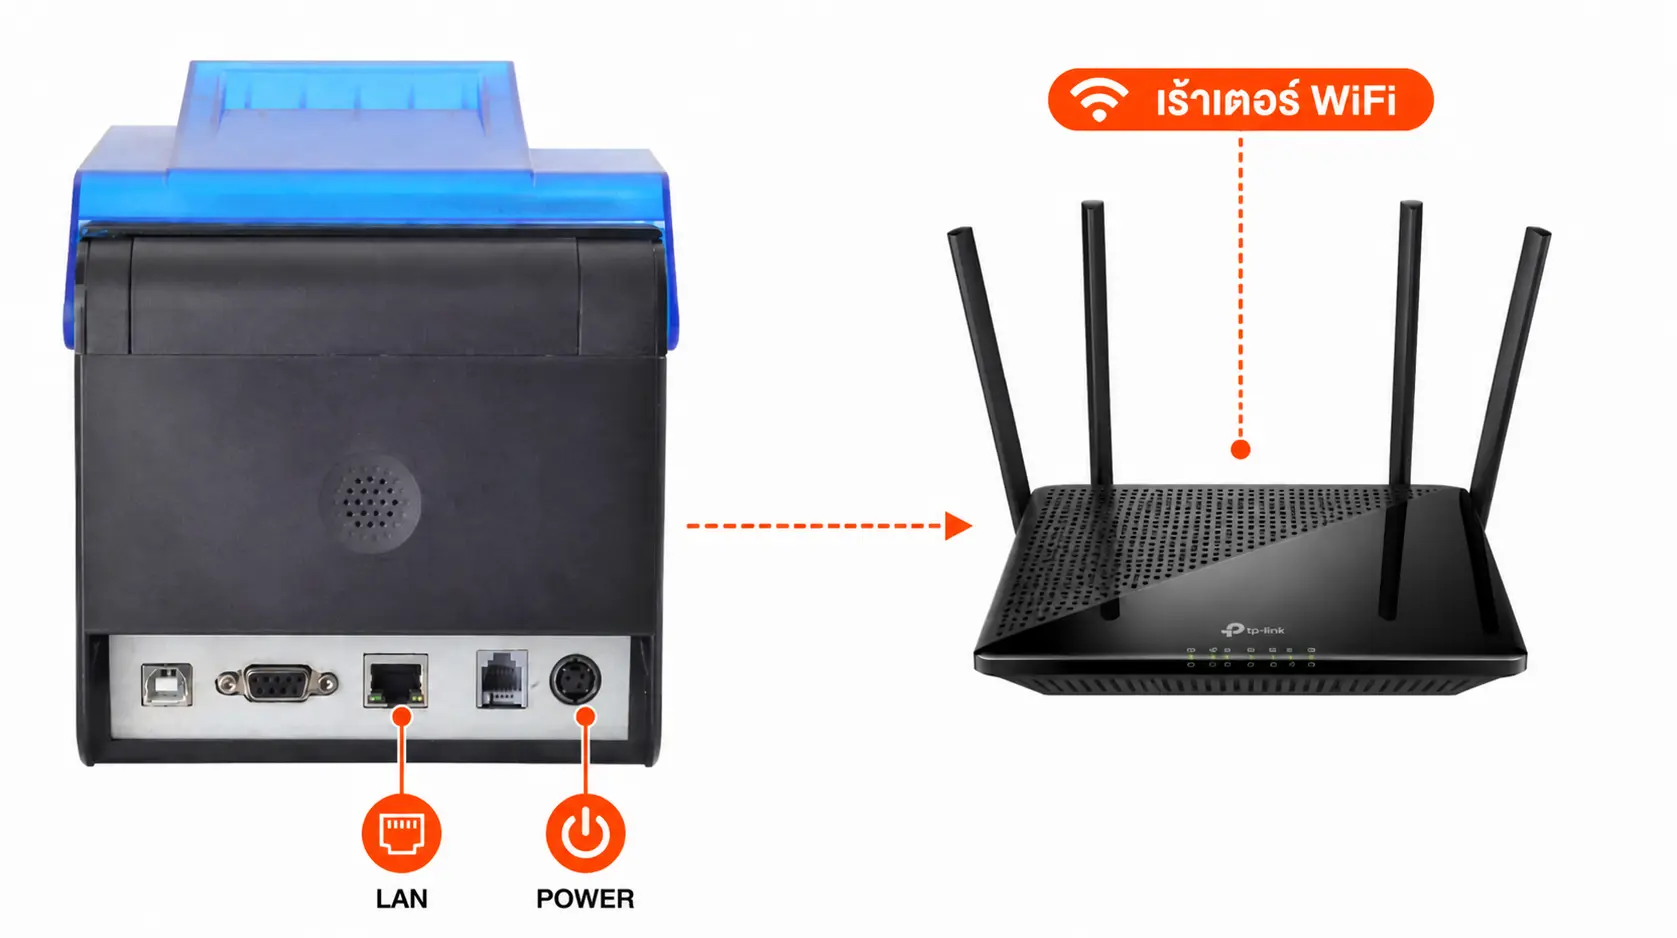
Connect the LAN Cable
Plug the LAN (RJ-45) cable into the Ethernet port on the back of the printer, and the other end into an open port on your router. Make sure the iPad running MeeD POS is on the same WiFi network as that router.
Load the Thermal Paper
Open the paper compartment cover on top, load an 80 × 80mm thermal paper roll with the heat-sensitive side (the smooth side) facing out, then close the cover securely.
Step 2 — Find the Printer's IP Address
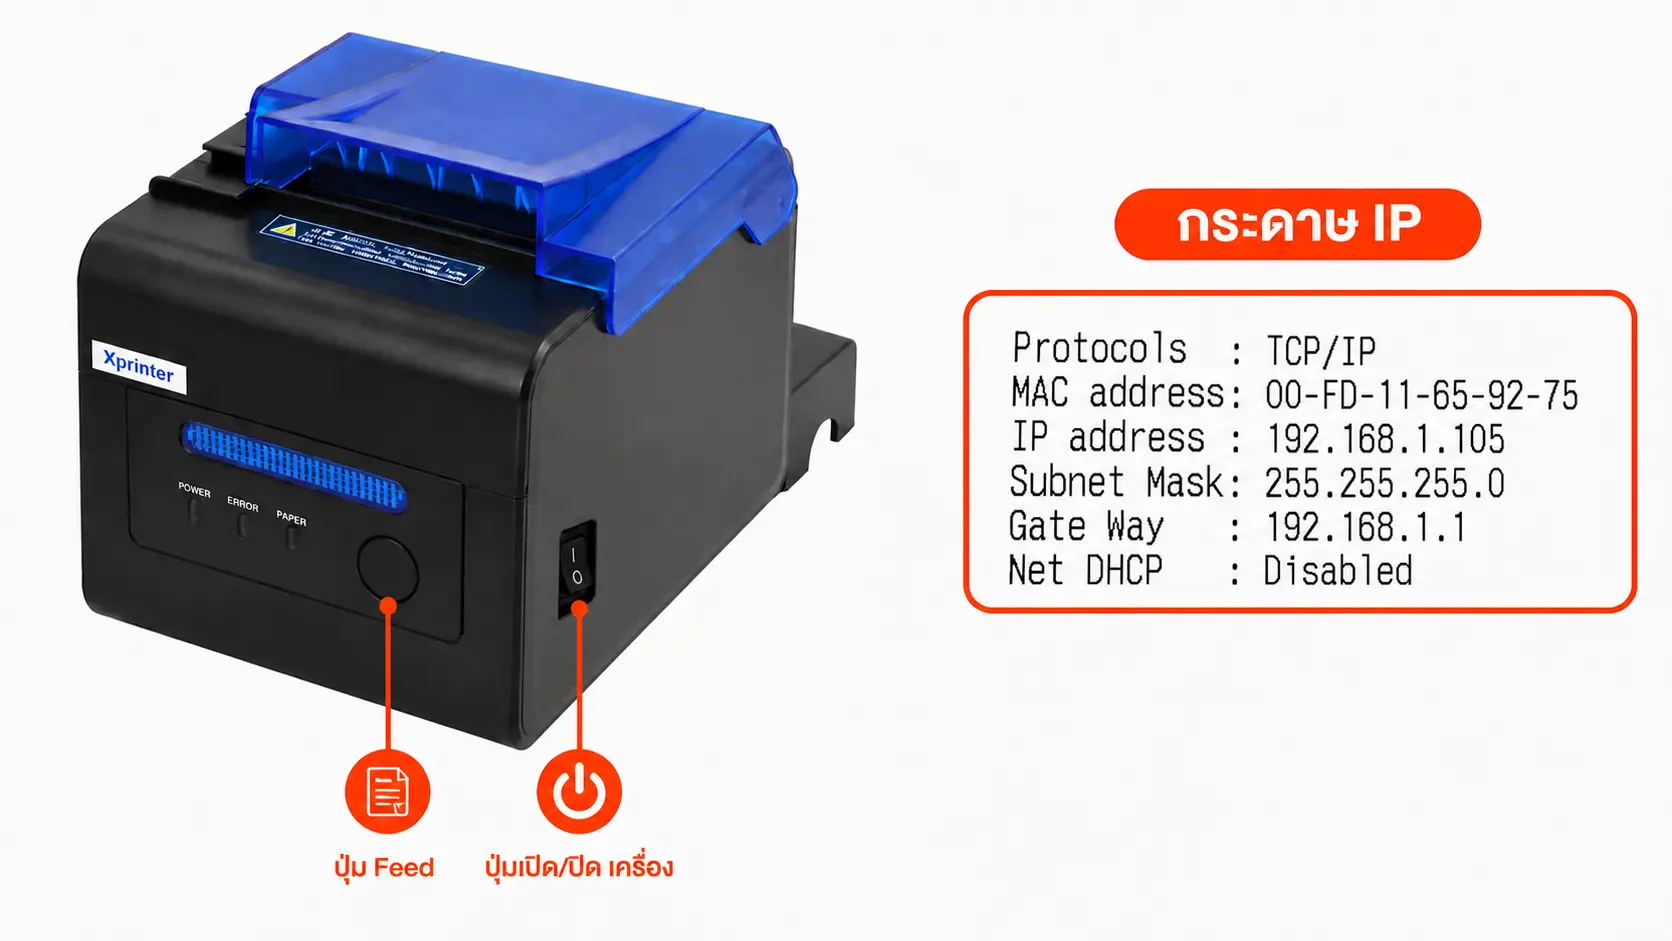
Hold Down 'Feed' First
Before turning it on, hold down the Feed button, then press the Power/Switch button at the same time to turn the printer on.
Wait for the Indicator Light and the Printed Test Page
When the LED starts flashing, release the Feed button — the printer automatically prints a test page. It shows the printer's IP Address, e.g. 192.168.1.105.
Step 3 — Check the IP on iPad (If Needed)
Open WiFi Settings on iPad
Go to Settings → Wi-Fi → tap the "i" button next to the connected SSID.
Check the iPad's IP Address
Scroll down to the IPv4 Address section — you'll see the iPad's IP, e.g. 192.168.1.110.
Note this down, to check whether the iPad and printer are on the same network (the first 3 numbers must match).
Step 4 — Connect It in the MeeD POS App
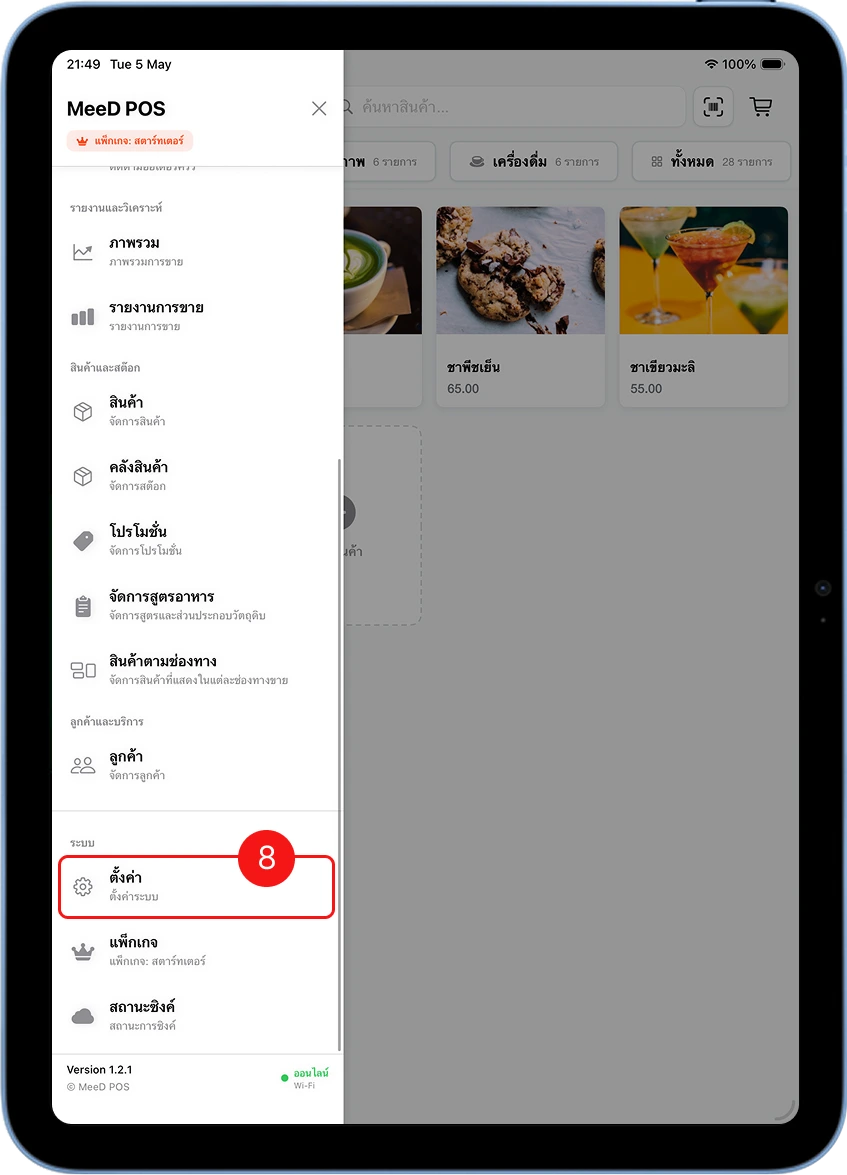
Open MeeD POS and Go to Settings
Open the MeeD POS app on iPad → tap Settings (the gear icon in the bottom-left corner).
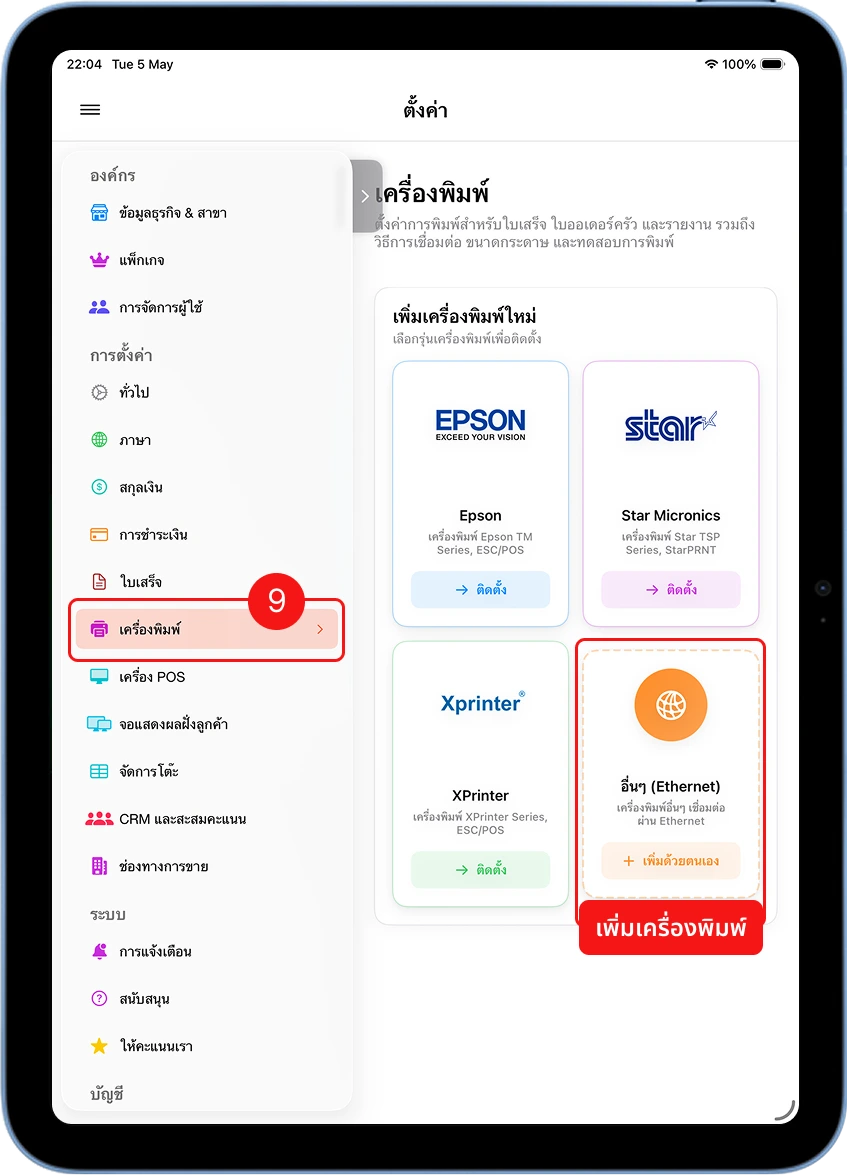
Open the Receipt Printer Menu
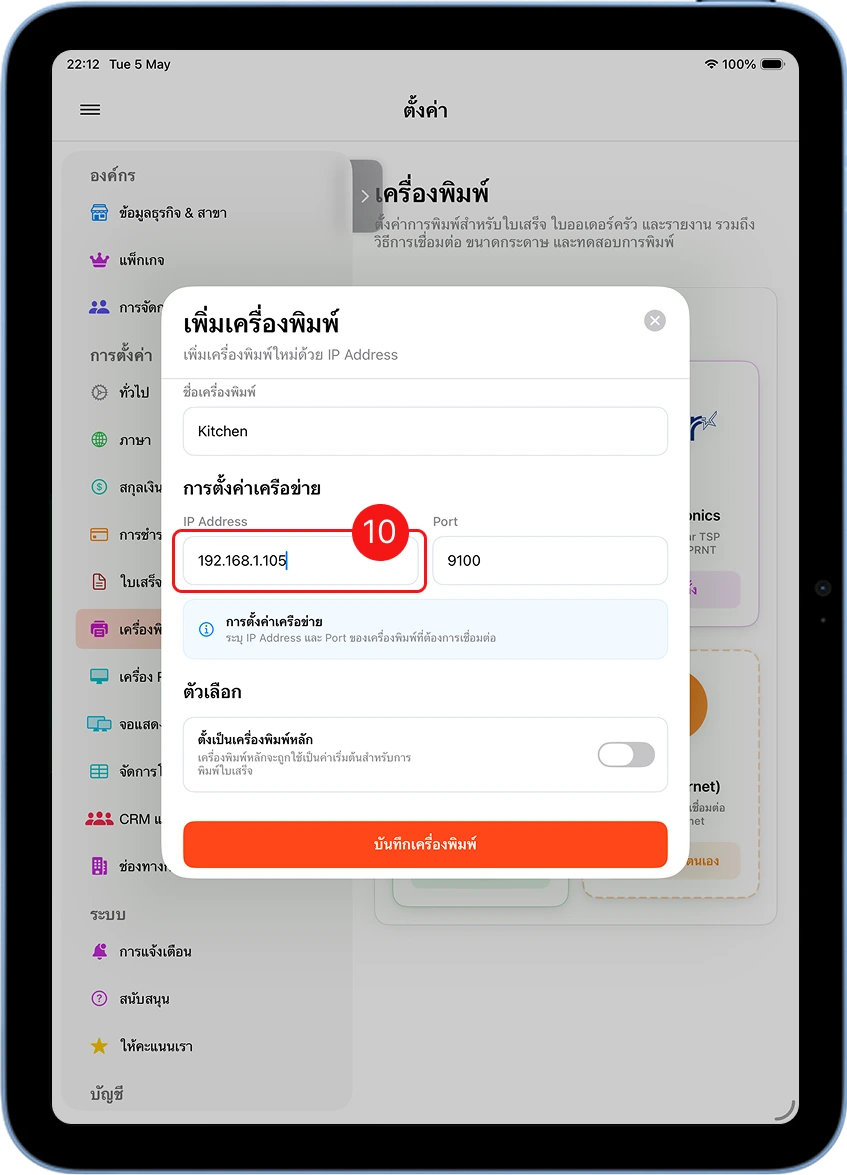
Select Printers → tap Add Printer → choose Ethernet / LAN as the connection type.
Enter the IP and Save
Enter the printer's IP Address from the test page in step 5 (the port is usually 9100), then tap Save.
Print a Test Page
Tap Print Test — if the printer outputs paper, the connection was successful. Additional settings are available too, like copy count, or setting this printer as a kitchen or receipt printer.

Basic Troubleshooting
The app can't find the printer
Check that the iPad and Xprinter are on the same WiFi/LAN, and that the IP doesn't conflict with another device on the network.
The printer doesn't print an IP test page
Try holding Feed down before turning it on, or holding Feed and pressing Switch again — you need to keep holding Feed until the LED starts flashing.
The printed text shows as boxes or is unreadable
Check that the printer model is set to Xprinter in the app, and that you're using standard 80mm thermal paper.
The printer disconnects mid-use
Check that the LAN cable is plugged in firmly on both ends, and that the LAN port light on the router is lit or flashing.
Need More Help?
Set it up but still can't connect, or want the team to help remotely? Get in touch.