What Is Goods Receipt?
Goods Receipt is the process of recording stock purchased from a supplier or vendor into the shop's inventory. Every time a receipt is confirmed in MeeD POS, the system automatically updates the remaining stock quantity and unit cost, keeping stock numbers accurate and ingredient cost calculations precise.The main flow is: create a new goods receipt → search for and add received items → enter the received quantity and unit cost for each item → confirm receipt. The system automatically generates a receipt number (e.g. GR-202606-0016) and logs a "stock in" (STOCK_IN) movement instantly. The receipt can be downloaded as a PDF for record-keeping.
MeeD POS Team · Tested on Web Dashboard ·
Why Record Every Stock Receipt
Many shops regularly buy ingredients or products to restock, but if receipts aren't recorded in the system, stock numbers in MeeD POS won't match reality — throwing off inventory reports and ingredient cost figures. Recording every receipt helps with:
- Stock matches reality — The system adds and subtracts stock quantities automatically every time goods come in or go out.
- Accurate product costs — The unit cost entered on a receipt is used to calculate ingredient cost and gross margin.
- Full traceability — Every receipt has a document number, date, and the person who processed it — download a PDF as a record.
- Better purchase planning — With accurate stock, low-stock and out-of-stock alerts fire on time, reducing stockout issues.
How to Receive Stock
Log In to the MeeD POS Dashboard
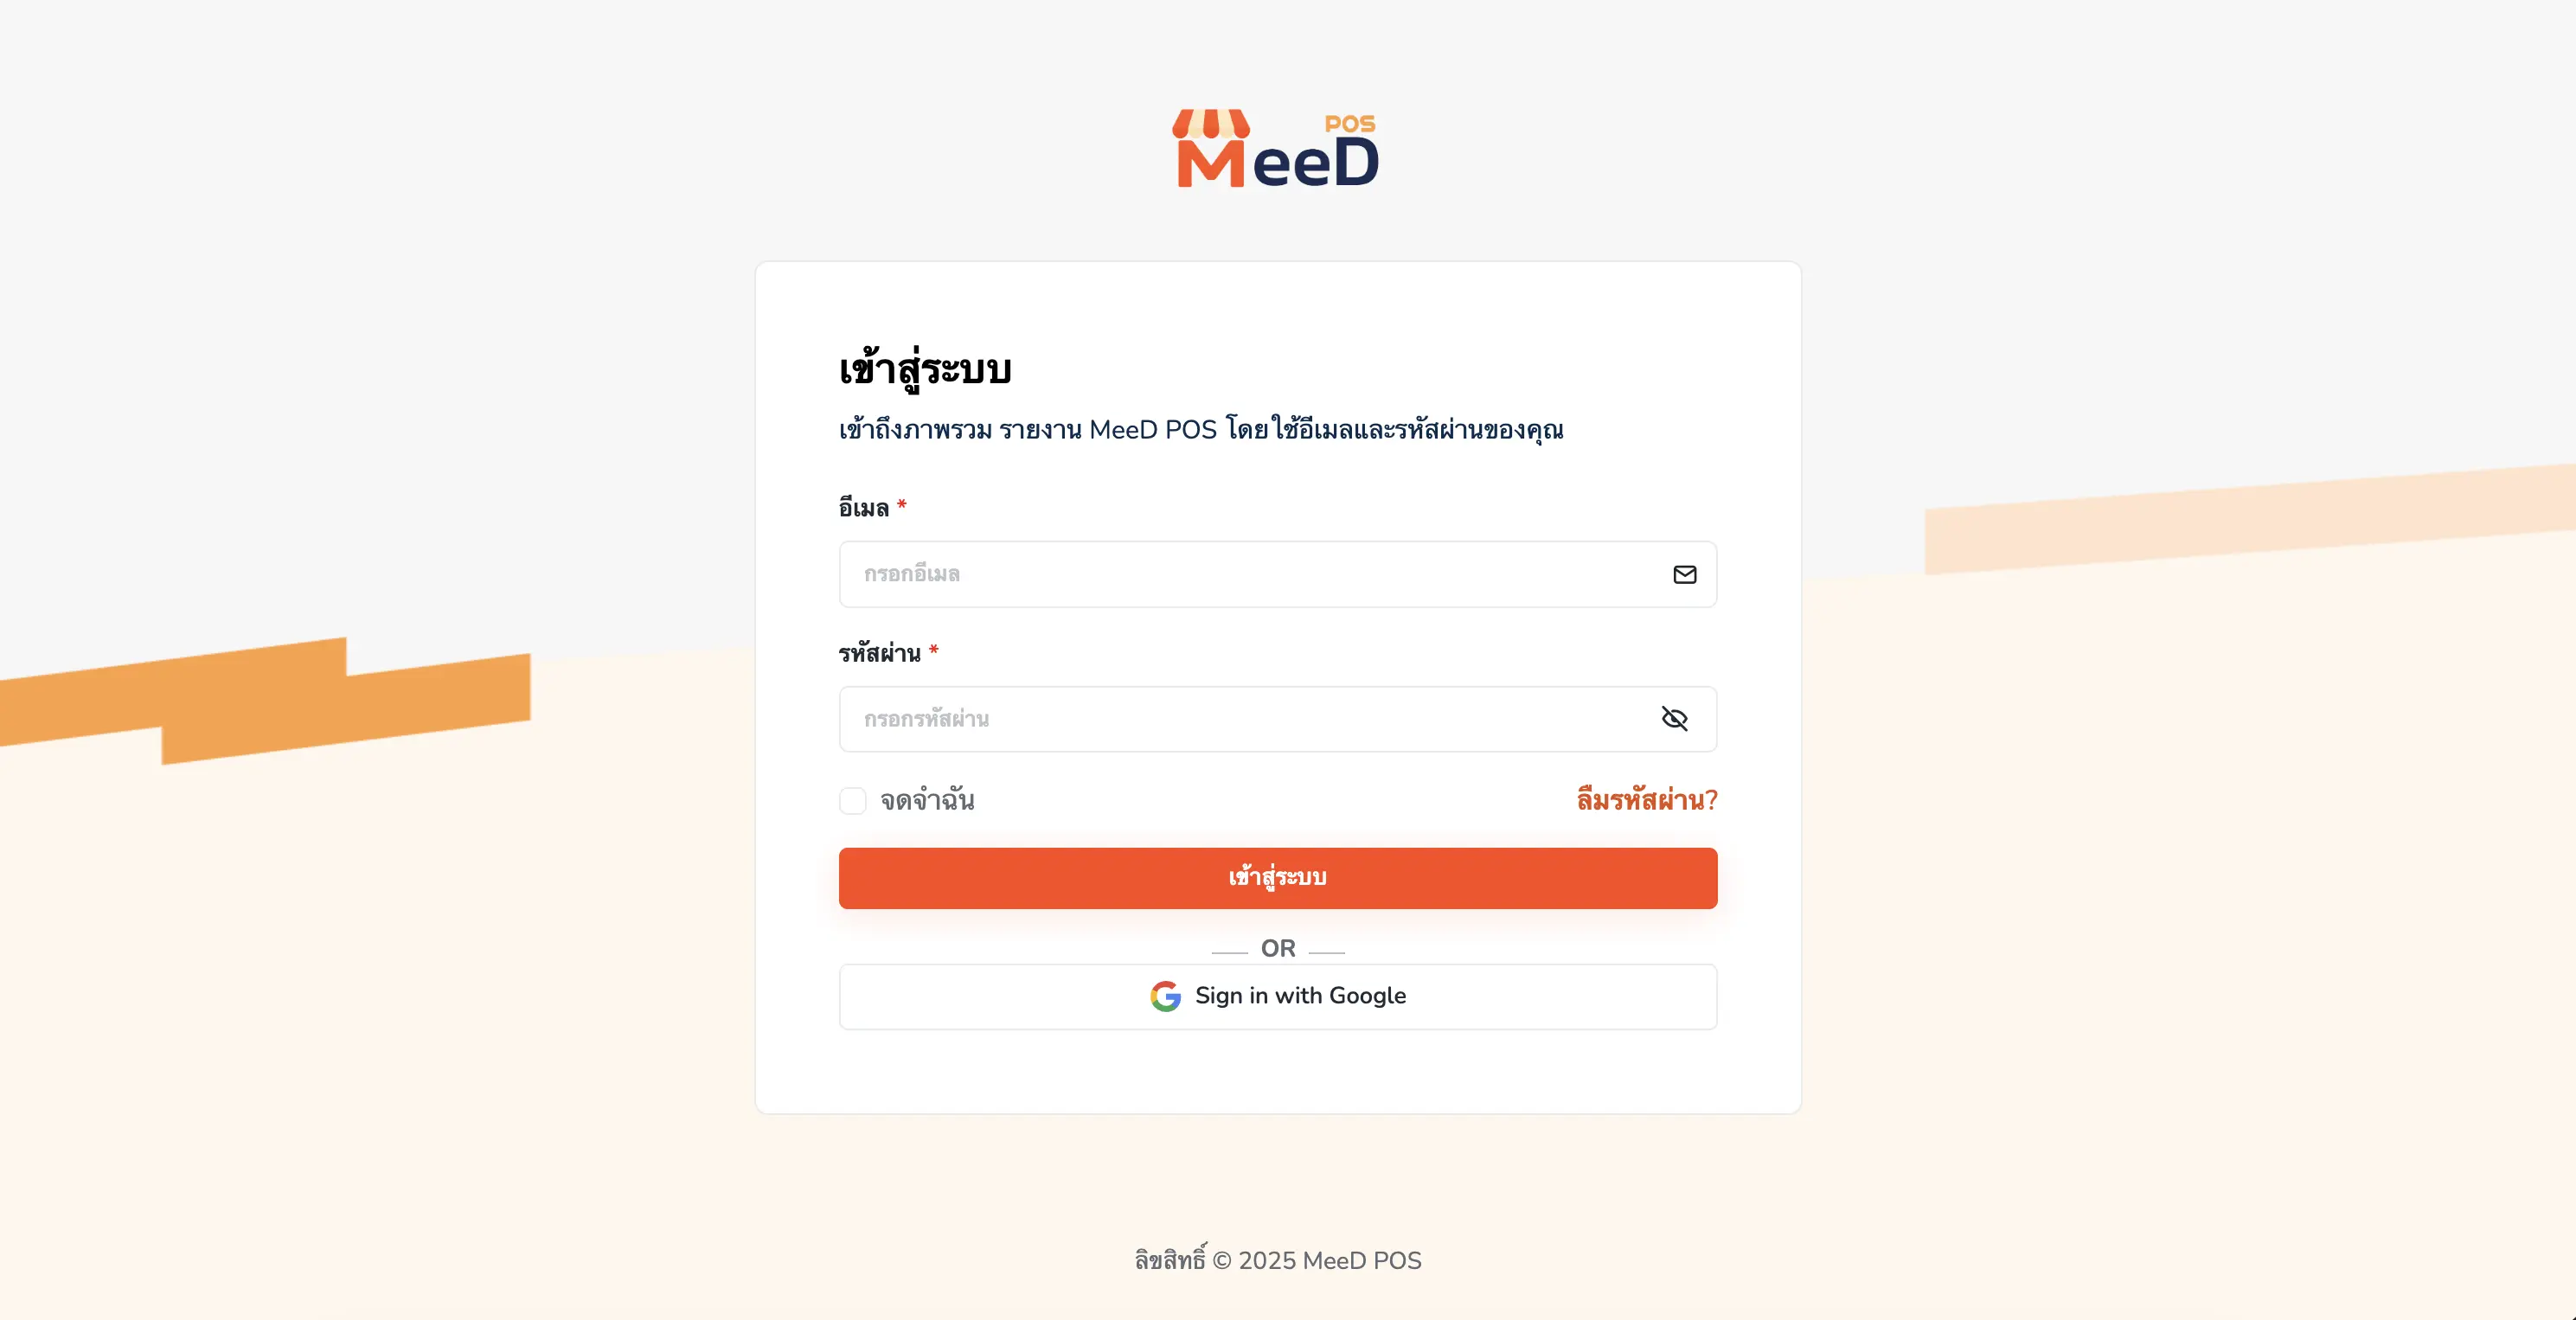
Open a browser and go to the MeeD POS Dashboard. Enter your email and password in the fields, then tap "Log In", or choose "Sign in with Google" to use a Google account. To stay logged in next time, check the "Remember me" box before logging in.
Go to 'Receive Stock' and Tap 'Create Receipt'
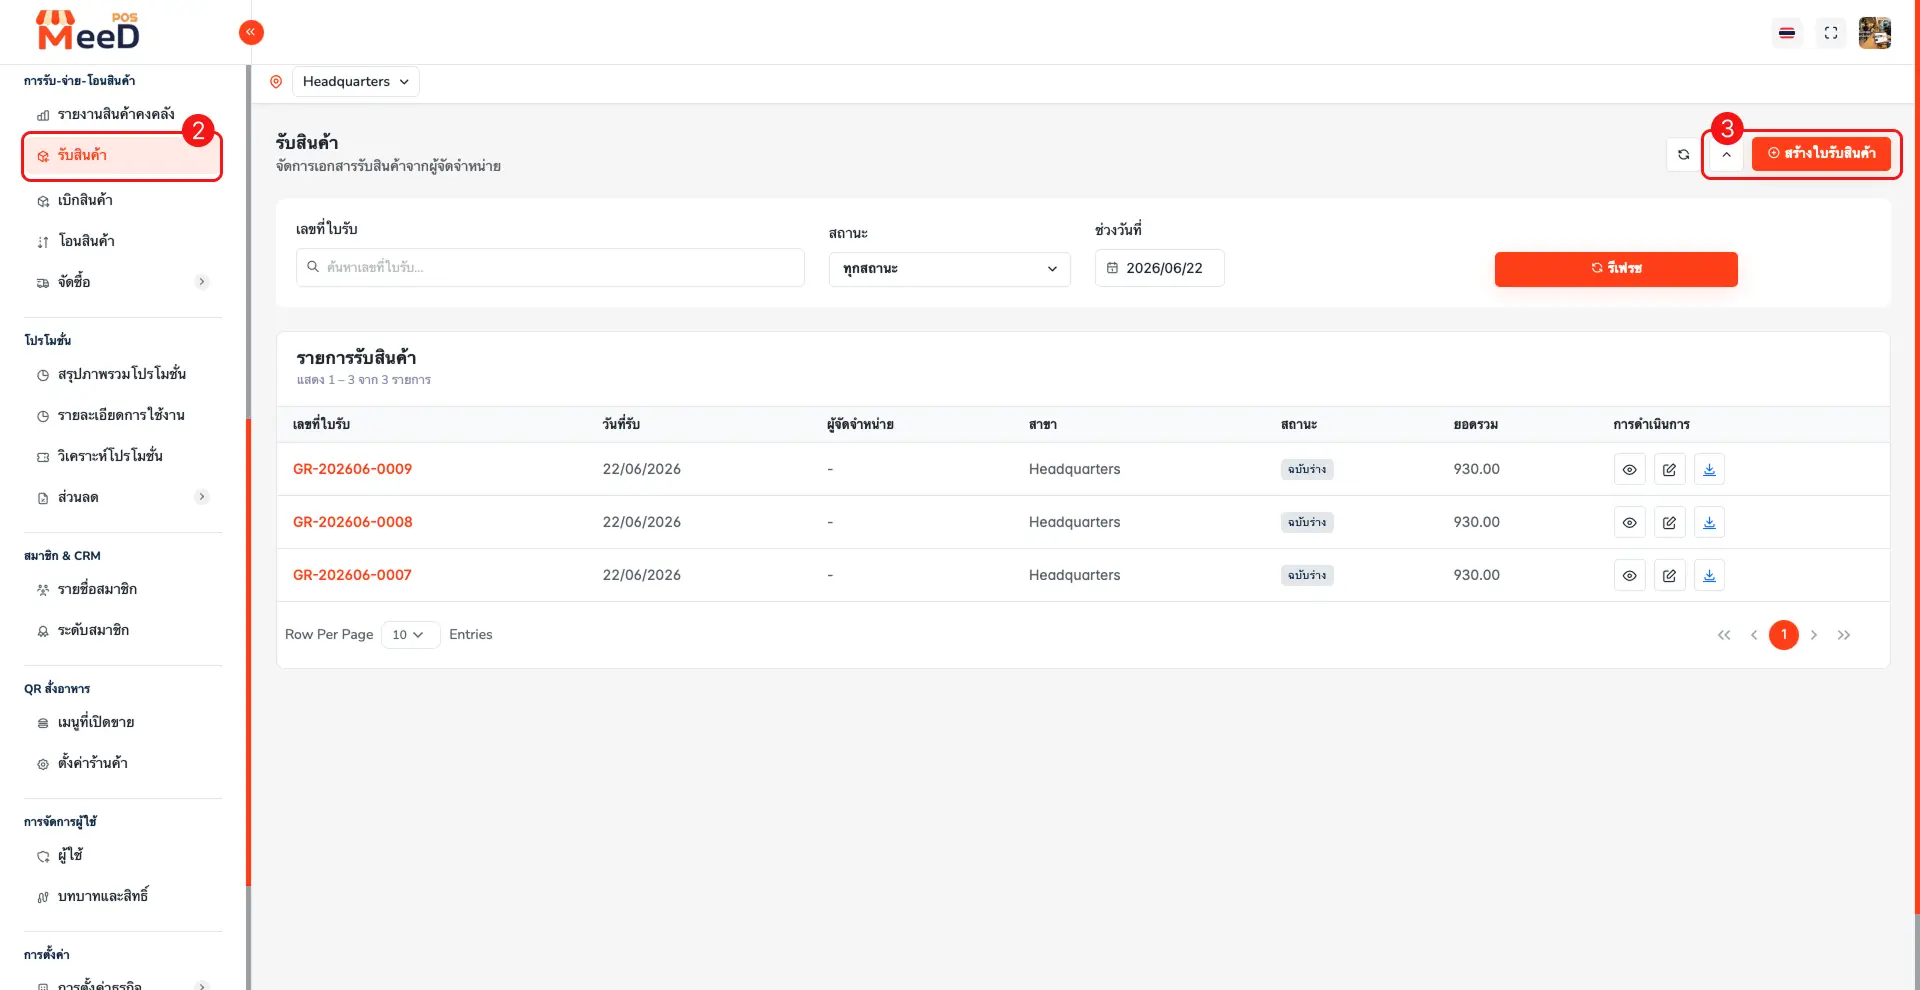
After logging in, select the branch you're receiving stock for from the branch selector at the top, then go to the "Receive Stock" page. It shows a list of all receipts, with 3 filters: Receipt Number (search by document number), Status (filter by receipt status), and Date Range (filter by receipt date).
The table below shows every existing receipt, with these columns: Receipt Number (that receipt's document number), Received Date (the recorded receiving date), Supplier (the vendor's name), Branch (which branch received the stock), Status (e.g. "Draft" for a saved-but-unconfirmed receipt), Total (that receipt's total value), and Actions (icons to view, edit, and download).
Tap the orange "Create Receipt" button in the top-right corner to start a new receipt.
Enter the Receiving Date and a Note
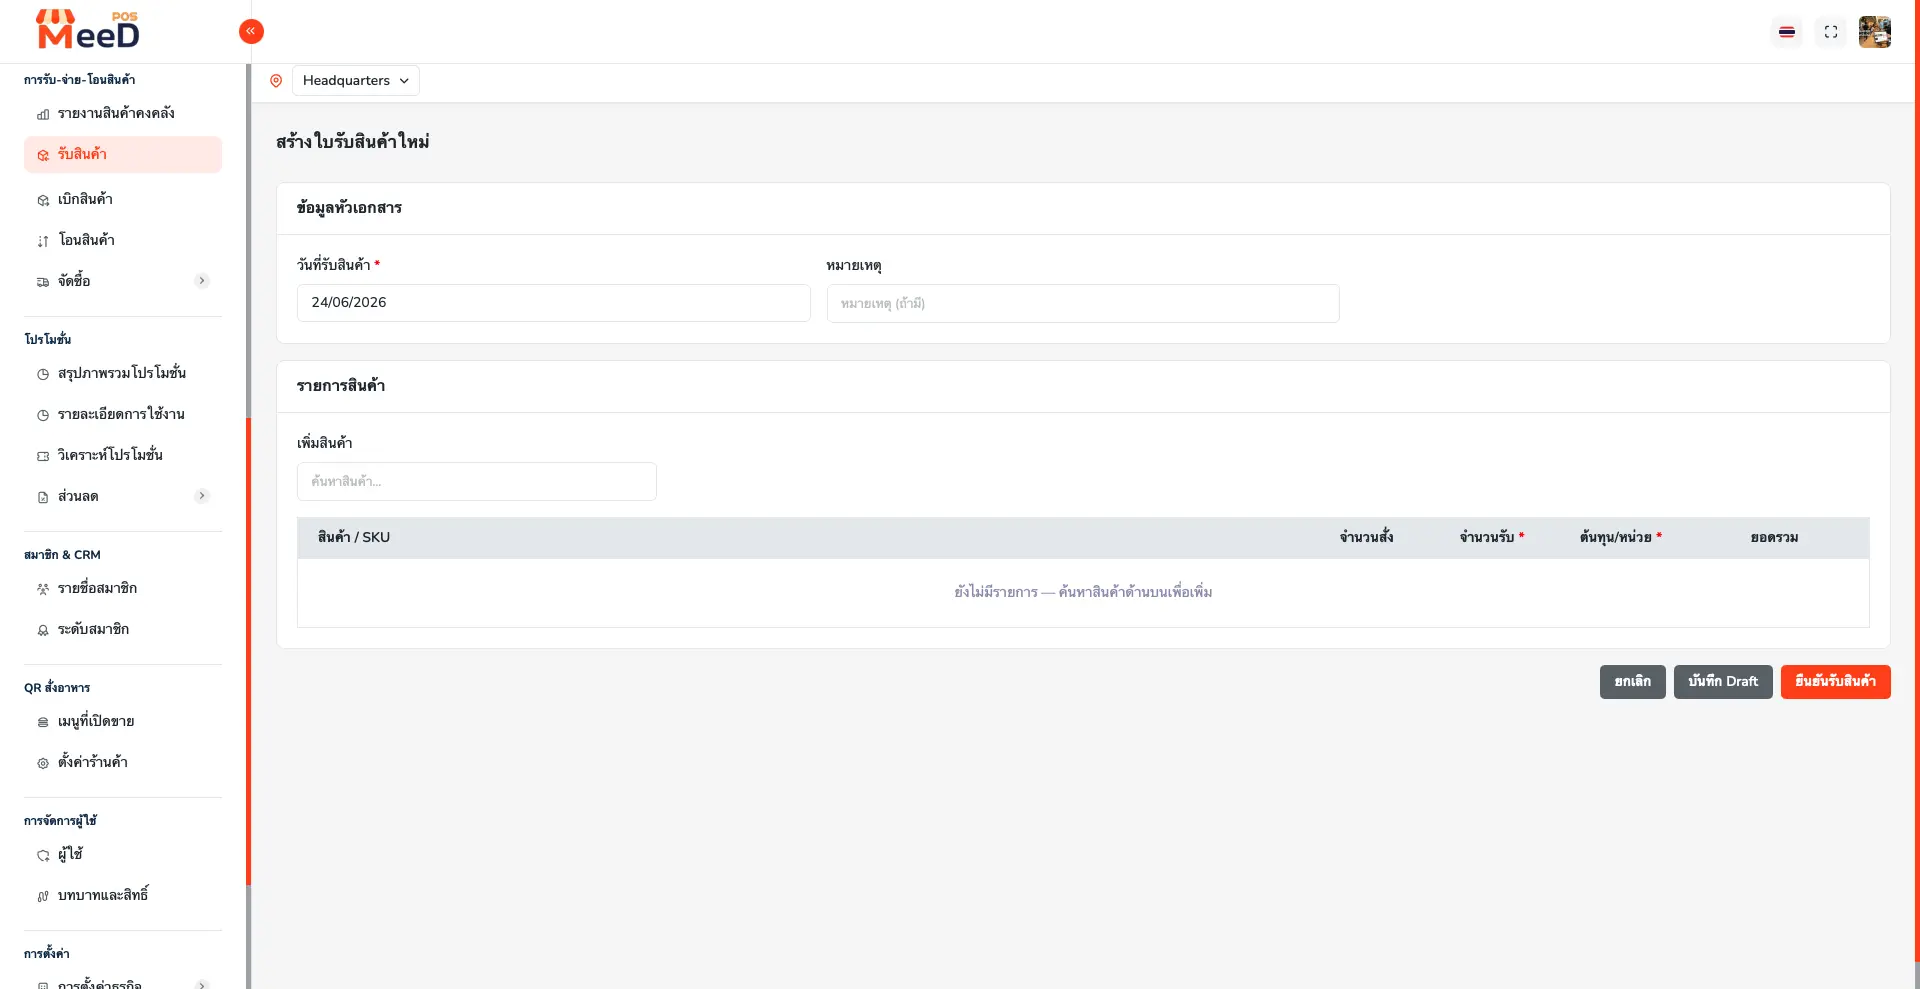
The system opens the "Create New Receipt" screen, split into 2 sections. The first is "Header Info", with a "Receiving Date" field (required, defaults to today's date, tap to change it) and a "Note" field for extra details, e.g. the supplier's delivery note number (optional).
The second section is "Items", which starts empty with the message "No items yet — search for products above to add them", and 3 buttons in the bottom-right corner of the form: "Cancel" (exit without saving), "Save Draft" (keep the list without affecting stock), and "Confirm Receipt" (confirm and update stock instantly — available once items are added).
Search for and Add Items
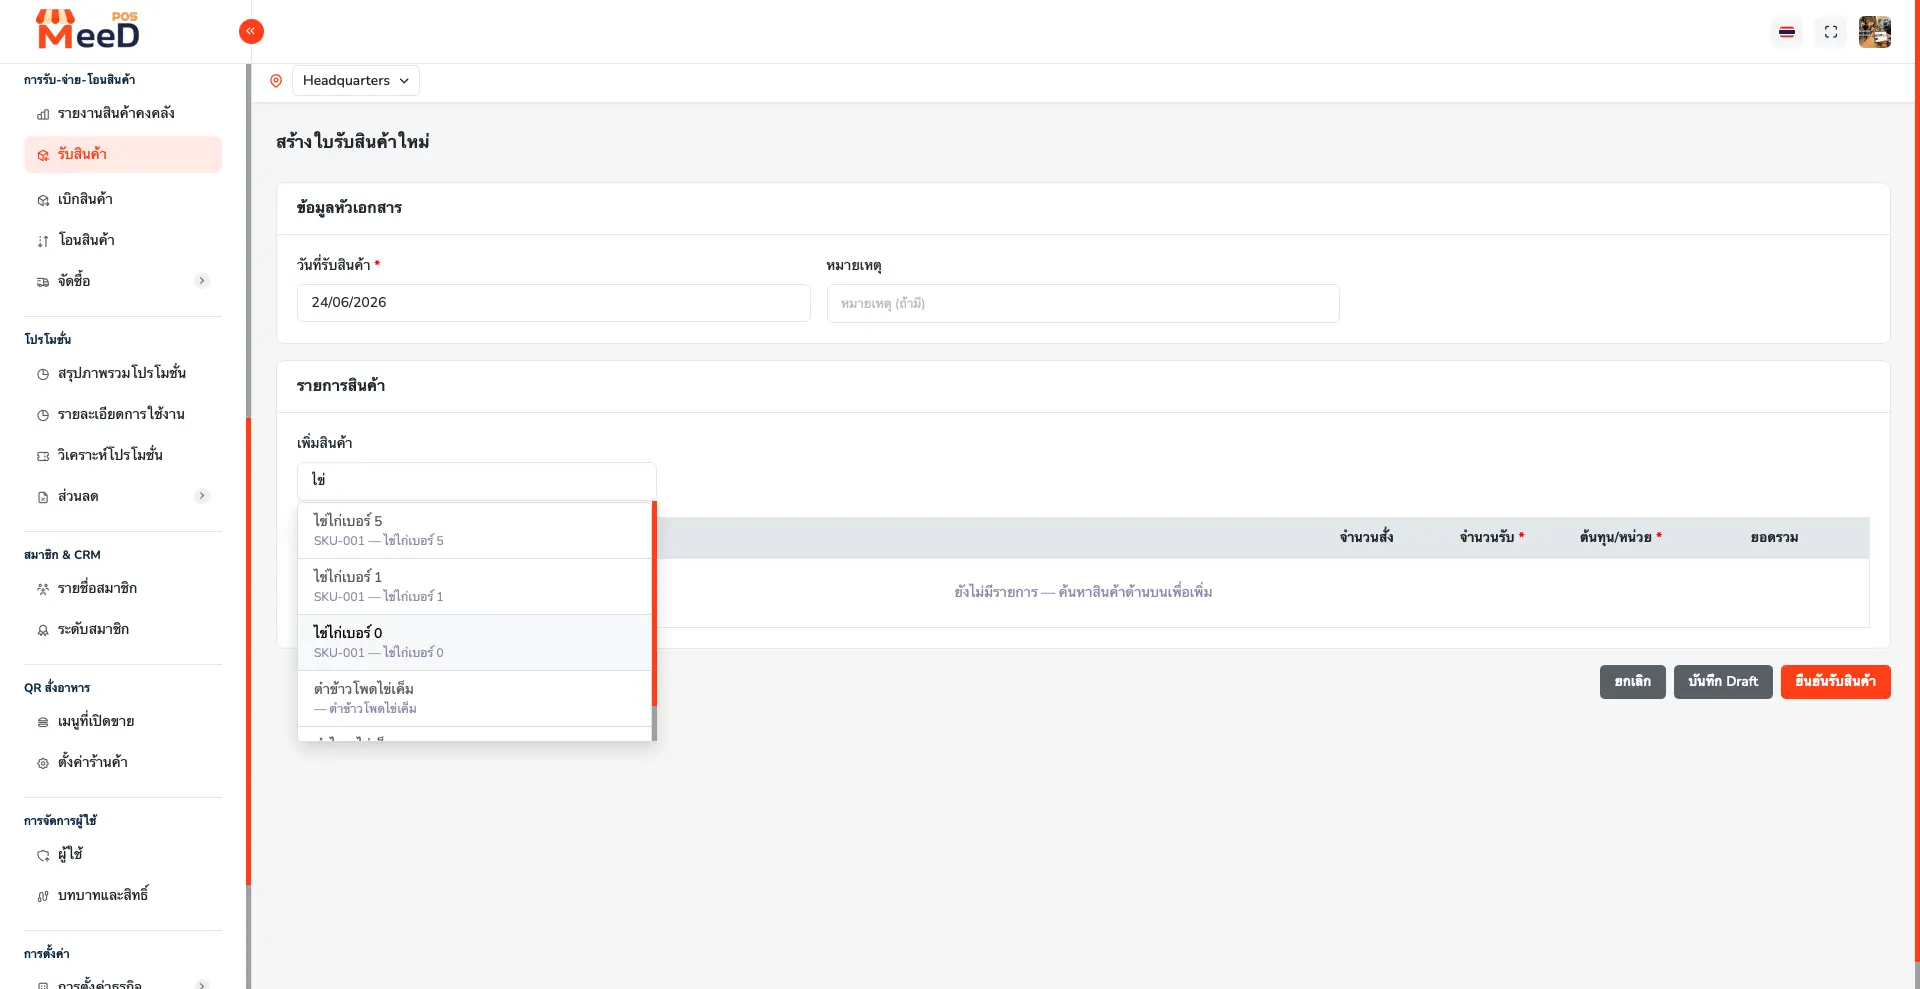
In the "Add Product" field, type the product name or SKU you're receiving. A dropdown shows matching products with their name and SKU — tap the one you want to add it.
Enter the Received Quantity and Unit Cost for Each Item
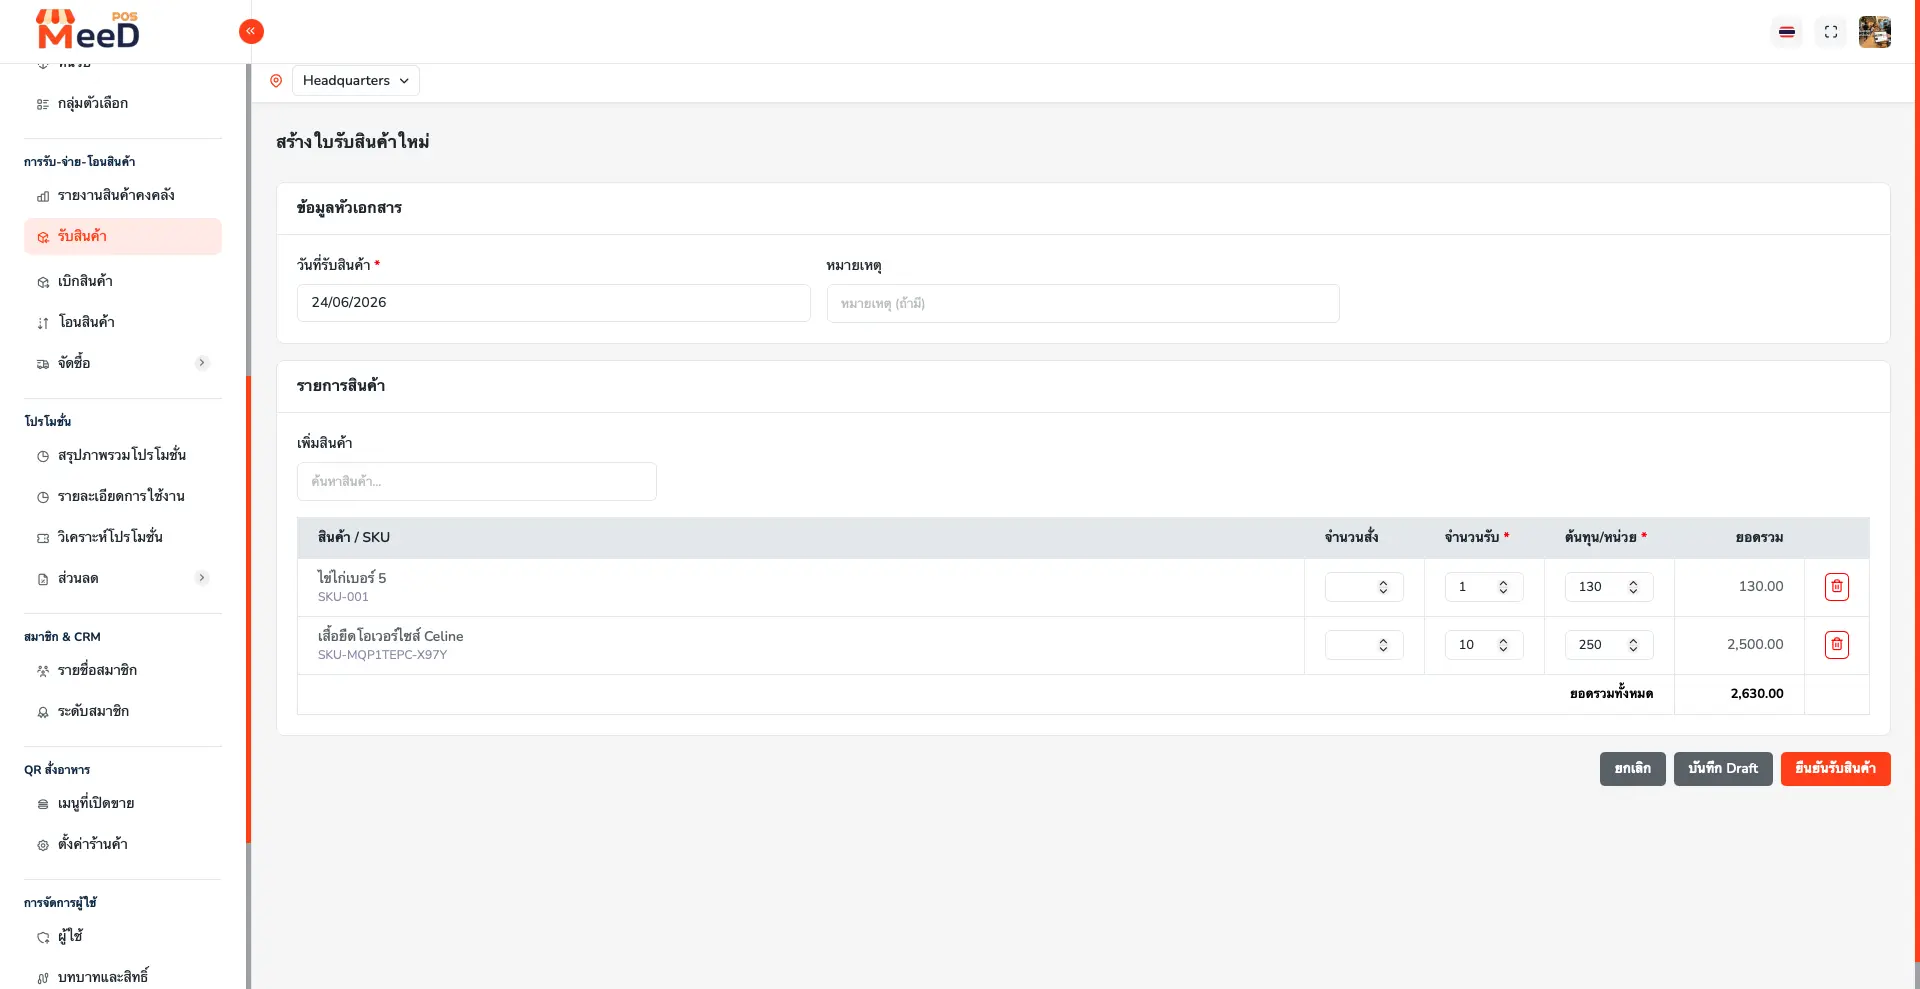
Once items are added, each row in the table has these columns: Product / SKU (the selected product's name and code), Ordered Qty (the quantity originally ordered, if any), Received Qty (required — enter the actual quantity received), Cost/Unit (required — enter that item's unit cost), and Total (auto-calculated as received quantity × unit cost).
To remove an item from the list, tap the red trash icon at the end of that row.
Below the table, on the right, the "Grand Total" for the receipt sums every item added — verify it matches the actual delivery note before confirming.
Confirm Receipt and Review the Document
Once everything checks out, tap the orange "Confirm Receipt" button. The system shows a "Confirm Receipt" popup warning that confirming will update stock and the items can't be directly edited afterward, with "Cancel" (go back and keep editing) and "Confirm" (confirm receipt instantly) buttons.
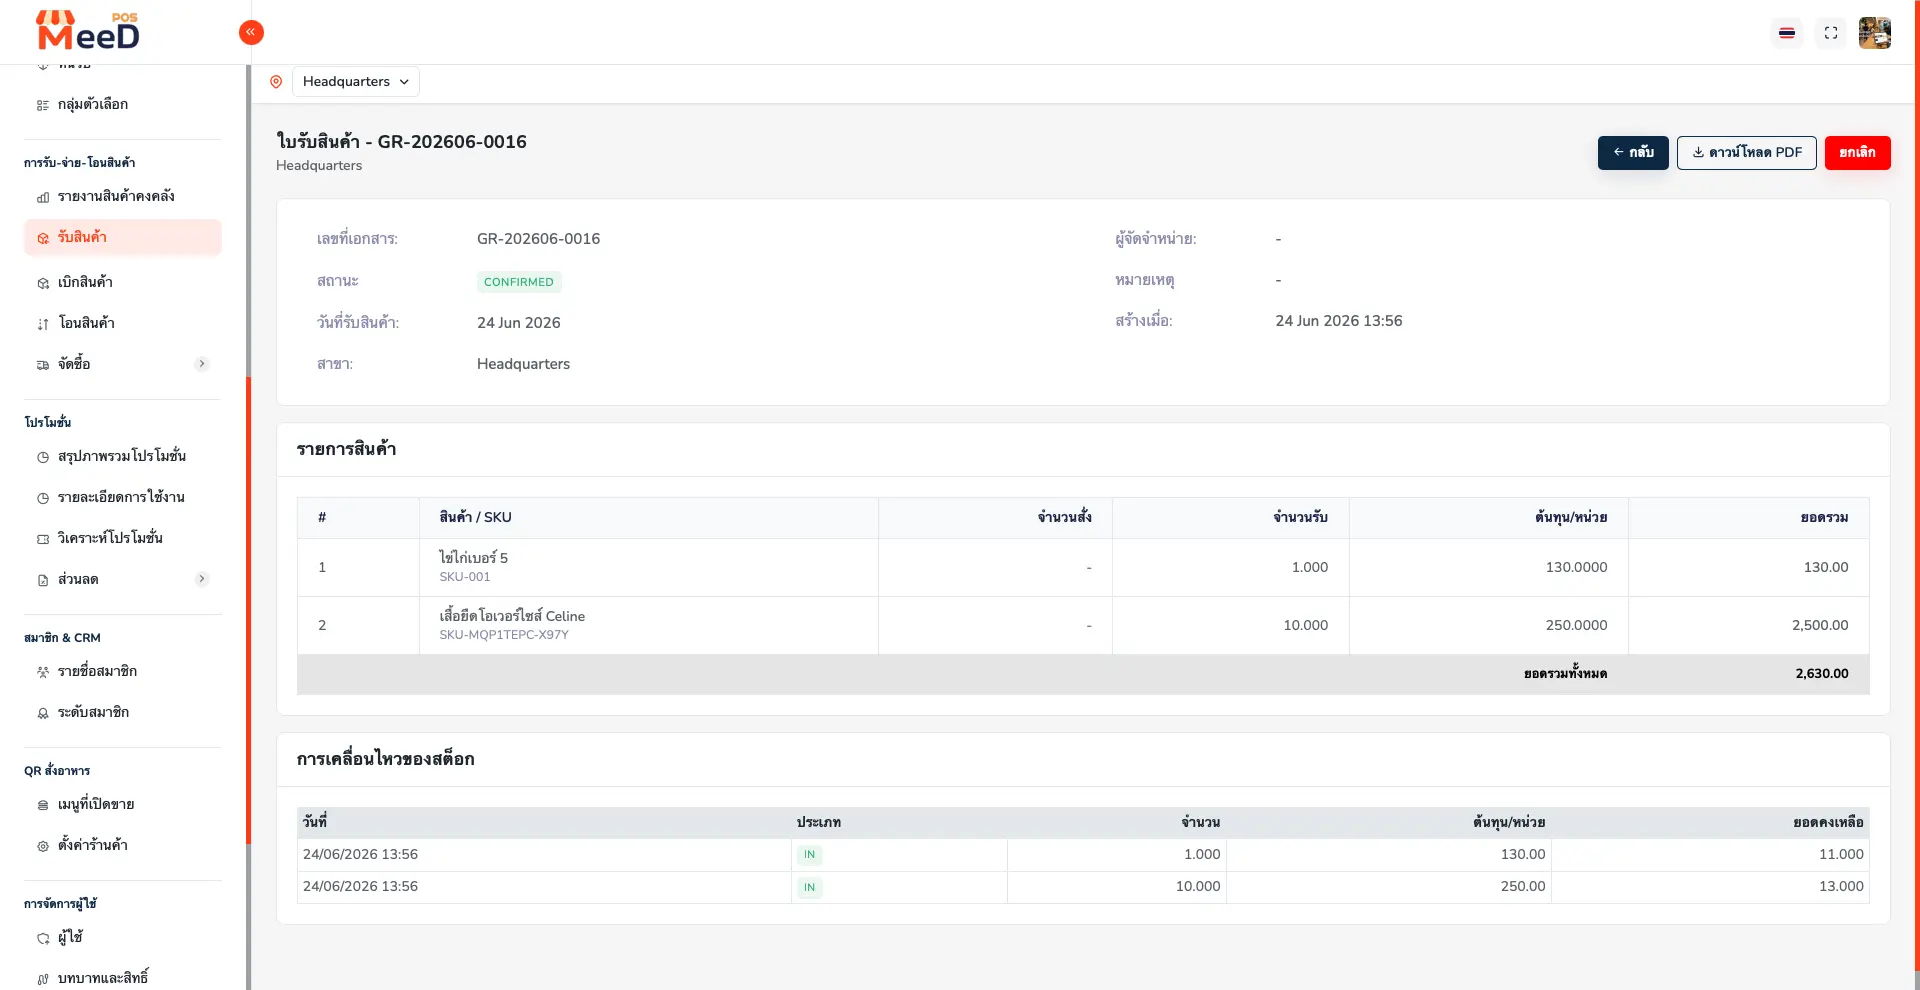
After confirming, the system takes you to the "Receipt" page showing the document number (e.g. GR-202606-0016), a CONFIRMED status, the receiving date, branch, supplier, and creation timestamp. In the top right are buttons: "Back" (return to the receipt list), "Download PDF" (save the receipt as a PDF file), and "Void" (void this receipt and pull the stock it added back out of the system).
Below that are the received items table and a "Stock Movement" table showing the stock movements this receipt generated, with the remaining quantity after receiving.
Check Stock Levels and Movement History
To verify stock updated correctly, go to the "Inventory Report" page. At the top are 4 summary cards: Total Products (the total number of products in inventory), Low Stock (items below their set threshold), Out of Stock (items with 0 remaining), and Total Inventory Value (the total value of remaining stock at cost).
Below that is the inventory table, showing remaining stock for every item, with a "View History" button at the end of each row to drill into that item's details.
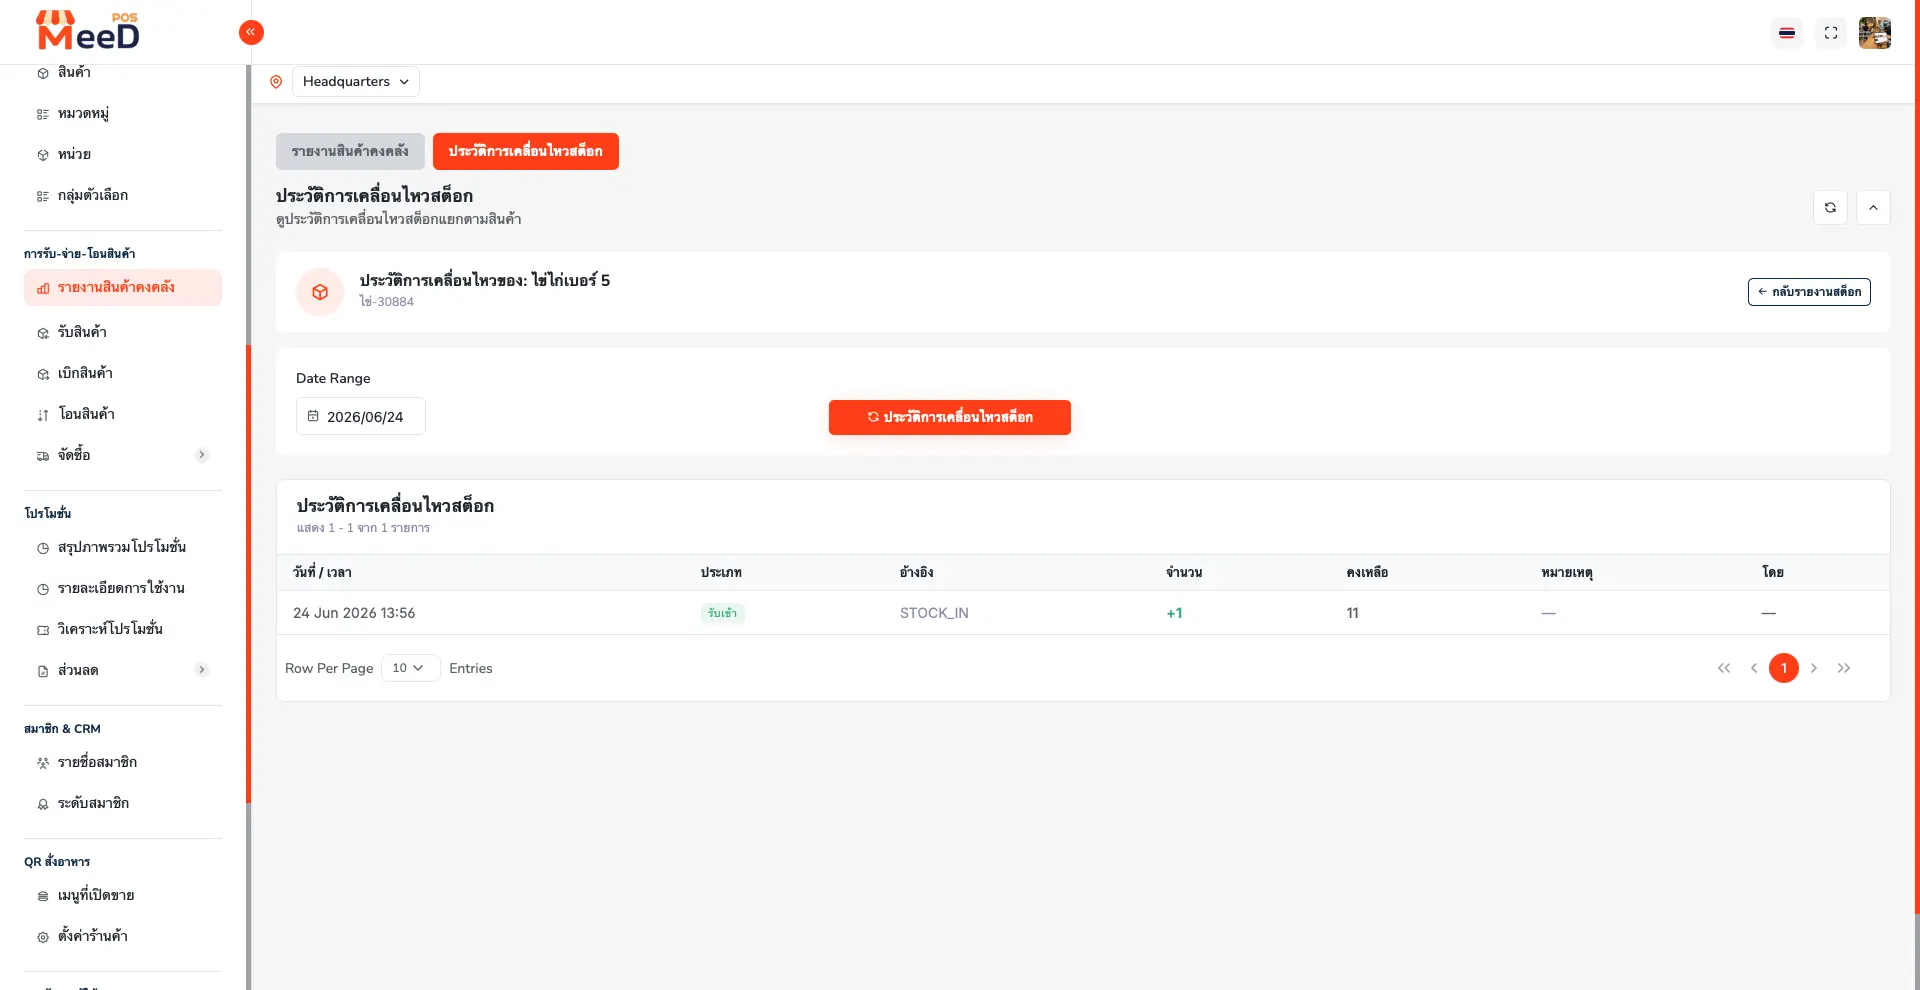
Tap "View History" for the item you want, to open its "Stock Movement History" page. It has a Date Range filter, and an orange "Stock Movement History" button to refresh or export data. The table below shows every movement for that item, with columns: Date/Time, Type (e.g. "Stock In" or STOCK_IN), Reference (the source document number), Quantity, Remaining, Note, and By (who processed it).
Good to Know Before Receiving Stock
Draft vs. Confirmed Receipt
Save as Draft if you haven't finished counting — stock stays unchanged until you confirm the receipt.
Confirmed receipts can't be edited
A CONFIRMED receipt locks its items, quantities, and costs instantly. Only "Void" (the whole receipt) is available to pull stock back. Always double-check quantities and costs before confirming.
Ordered qty vs. received qty
If you received less than what was ordered, enter the actual quantity received, not the ordered quantity.
Keep the PDF as a record
Download the receipt PDF every time you confirm one, to cross-check against the supplier's delivery note or for accounting purposes.
Frequently Asked Questions
Can I edit or delete a confirmed receipt?
You can't edit the items on it. Once confirmed, the status changes to CONFIRMED and the items, quantities, and costs are locked instantly. You can tap "Void" to void the entire receipt, which pulls the stock it added back out of the system. If only some items were entered wrong, void the receipt and create a corrected one.
Can I save a Draft and confirm it later?
Yes — tap "Save Draft" to keep the list without affecting stock yet. Useful when stock arrives but you haven't finished counting, or you're waiting on the supplier's delivery note to cross-check. When ready, open the Draft and confirm receipt.
If this batch's cost differs from the last one, how does the system calculate cost?
The system records the unit cost entered on each receipt, so product cost always reflects the most recent purchase price. You can trace each stock movement's origin from that item's stock movement history page.
Can I see all stock movements for a single item?
Yes — go to the Inventory Report menu and tap "View History" for the item you want. It shows the full movement history — receipts, issues, and transfers — with the remaining quantity after each entry and who processed it.
Related Articles
Need More Help?
Running into an issue with receiving stock or a stock mismatch? Want the team to take a look? Get in touch.